Bee Keeping 101: Spring Management
- Penn State Extension & JS

- Apr 11, 2020
- 28 min read
Spring Management: getting a new hive off to a good start, or kick-starting an existing hive, in the spring. There are slight differences in how to handle a new colony versus existing colonies, so we're going to cover both scenarios. We'll spend more time discussing overwintered colonies. We'll look at feeding strategies, spring splits, swarm management, and take a peek at adding supers, which we'll cover more extensively in Module 5.
New & Overwintered Colonies
New Colonies
New colonies, whether created by buying packages or nucs or making splits, are typically started in the spring. Packages should be scheduled to arrive 6-8 weeks before nectar flow begins, which will vary depending on your geographic location.
Packages should be scheduled to arrive 6-8 weeks before nectar flow begins.
Two major concerns after installing a new colony are making sure that it has:
· Sufficient food
· Sufficient space
Reasons for New Hive Failure
Hives started from packages sometimes fail to thrive. There are a number of reasons for this:
· Queen is replaced by her colony, prolonging hive development.
· Queen is unmated.
· Queen suffers damage during shipment or installation.
· Beekeeper disturbs the hive too often.
· Bees starve.
· Bees are infected with disease, mites, hive beetles, wax worms, or wax moths (note: the bees tend to become mean/hot when any of these infections happen... if your bees are more aggressive than normal start checking for these and get rid of them asap).
· Bees abandon the hive or hive freezes during winter due to too few bees in the hives.
Note
Bees are often unable to locate their hive immediately after they are installed into it, so expect some degree of "drifting." Drifting may be worse when several packages are installed into several hives simultaneously within the same apiary.
Caring for a New Colony
1. Feed the colony sugar syrup.
Feed sugar syrup to colonies that are hived on frames of foundation until the combs are completely drawn out and honey is stored in several of the frames (in approximately 4–6 weeks). Sugar syrup in a plastic zipper bag, placed on top of the super

2. Reduce the hive entrance.
Reduce the size of the opening of the hive entrance initially, and increase it when the colony is bigger and temperatures are warmer. You can install an entrance-reducing cleat to help keep the inside of the hive warmer if installing bees in early spring.
The three steps to installing an entrance-reducing cleat
3. Add a brood chamber.
Add another brood chamber in 4–5 weeks or once the bees have drawn out 7–8 of the frames in their existing chamber.
4. Add supers.
Add supers if the season is favorable and colonies are strong enough. Typically supers are added at the time of dandelion and fruit bloom.
5. Continue management.
By the fall, a new colony should be managed in the same way as a full-strength colony.
Overwintered Colonies
If you have overwintered bees, it may be necessary to feed them to keep them alive until the first nectar flow in spring. There is no simple explanation or plan for feeding because conditions will vary every year. Some of these conditions may be the result of beekeeper intervention, while nature can be counted on to throw a curve ball every once in a while.
Pennsylvania apiary in late winter
Colonies in the northeast require 60-80 pounds of honey to survive the winter. If the beekeeper harvests too much of the bees' honey in the fall, there is always the chance that there won't be enough honey for the bees to make it all the way through winter, in which case supplemental feeding will be necessary.
If you notice the bees are at the top of the hive, it is a good time to give them sugar candy.
Sometimes, if the weather conditions are unfavorable for nectar production, even industrious and healthy bees won't have stored enough honey to adequately prepare for winter.
Feeding Overwintered Colonies in Late February–Early March
Starvation usually occurs in late February to early March. At this time, the queen has been laying eggs for several weeks, so young bees are starting to come on and a lot of honey is being consumed.
If you notice the bees are at the top of the hive, it is a good time to give them sugar candy. Refer back to the Feeding page for the sugar candy recipe and additional details.
4.3 Spring Splits
Dividing a strong colony into two smaller colonies of equal size is a great way to:
· Increase your colony numbers in the spring.
· Make up for winter losses.
· Help prevent swarming.
There are a number of ways to divide a colony. Here are two prominent ways:
· Make a division or nucleus colony (nuc).
· Split the colony with a double screen.
If you have a strong colony coming out of the winter, you may want to split it to increase hive numbers and prevent swarming. There are several ways to do this. The first one is a standard split. If the bees and brood are roughly divided equally between two boxes, you can simply remove one box with its bees, brood, and stores and place it on a new bottom board. If you are keeping the split in the same apiary with the parent colony, always keep the existing queen with the new split. This helps keep those bees from wanting to return to the parent colony. The original colony can make its own new queen, or you can introduce a new one like Tom did in Module
3. This technique of letting the colony make its own new queen works well if there are swarm cells already present in the parent colony. Once you've made the split you'll want to give both hives plenty of room by adding a brood chamber and honey supers to each of them.
Advantages of Splits
· The parent colony is less likely to swarm.
· Both colonies can produce honey.
· In a double-screen scenario, the parent colony will keep the new colony warm.
Disadvantages of Splits
· Some time and effort are needed.
· Less honey may be produced by each of the two colonies.
Nucleus Colony
Watch the video to see how to create a nucleus colony.
A successful split will produce surplus honey in the fall and should overwinter well.
A nucleus, or nuc as it's called, is created by taking three to six frames of brood and the bees that are clinging to those frames, including the queen and putting them in a separate nuc box or hive body. At least one frame with honey and pollen is also included so the bees have food. Fill up the rest of the box with foundation or previously drawn comb. As that new nucleus grows and fills the empty combs, you can transfer it to a brood box, add supers, and begin treating it like a full-sized colony. Many people sell and buy nucs as starter colonies. In those cases, the nuc typically has a new queen.
Making Nucs
1. Remove 3–6 frames of brood and bees from a strong colony and move them to the center of a new hive body or into a nucleus box.
2. Replace the missing frames in the original hive with foundation or drawn comb.
3. Reduce the entrance of the nuc box or hive body that houses the split, to prevent robbing
4. Provide supplemental honey or sugar syrup to stimulate colony growth, unless there is a nectar flow.
Nuc box with the first frame inserted
Putting the old queen in the split reduces the likelihood of those bees returning to the parent colony.
We recommend putting the old queen in the split because it reduces the likelihood of those bees returning to the parent colony. It is also possible to introduce a new queen or include some queen cells in the nuc box.
If introducing a new queen in the split, try to place it at least 2 miles away to prevent bees from returning. If the split is made in a nuc box, it will have to be moved to hive body soon, as a good split will outgrow its nuc box quickly.
A successful split will produce surplus honey in the fall and should overwinter well.
Double-Screen Split
The double-screen split can be used a little bit earlier in the spring, because the heat from the lower colony will rise up into the newly split colony in the same hive.
Here's how to make a double-screen split from a colony consisting of two brood chambers:
1. Find the old queen and place her with about half the brood, preferably unsealed, in the bottom brood chamber.
2. Place a second hive body with drawn combs or foundation above that-
3. Place the double screen on top of that, with the entrance facing in the opposite direction from the lower hive.
4. Now place the second brood chamber on top of the double screen with 5–6 frames of (mostly sealed) brood and two combs of pollen and honey on each side of the brood.
5. Install a new queen or place some frames with queen cells into the top box.
6. Try to get about two-thirds of the adult bees in the top box, since many field bees will return to the lower body after a flight
7. A few weeks after the new queen starts laying eggs, you can move the upper colony away from the lower colony, set that brood chamber on its own bottom board, and provide a second brood box and supers as needed
Note
If you are combining frames from several colonies while making a nuc, spray them with 1:1 syrup to reduce fighting.
Swarming
Why do bees swarm? Swarming is a natural behavior and it's how honey bees reproduce. While it's impossible to stop bees from swarming, we work to minimize this behavior because it leads to a loss of both honey production and bees.
Swarming is the way bees reproduce in nature. If you think of the whole colony as analogous to a single-celled organism, swarming is like the moment when a cell divides and becomes two organisms, both complete and healthy. As beekeepers we try to discourage bees from swarming since this decreases their honey production, and we lose the bees. There are different factors that trigger swarming, but nothing encourages this behavior more than a congested brood nest. Colonies prepare for swarming by raising many queen cells simultaneously, while also raising drones. Then they feed the existing queen less royal jelly so her egg-laying slows and her abdomen shrinks. In order to be ready to fly, she needs to lose up to 50% of her body weight. Just before the swarm emerges from the hive, workers will fill up on honey to power their flight. Then, when the time is right the old queen, a few drones, and 50 to 60 percent of the workers will come out of the hive and cluster on a comfortable staging area nearby, maybe a tree branch, where they will remain for hours or even days if necessary. From there, scout bees will seek an appropriate cavity, where they then lead the swarm to make its new home.
Congestion
Although swarming is not very well understood, several possible factors can lead to its initiation. The most common factor is congestion within the brood area. As the brood area increases, space for nectar storage decreases, prompting division of the colony.
Congestion can also obstruct the diffusion of "queen substance" (pheromone), which may add to the colony’s desire to produce new queen cells and swarm.
Congestion might also cause a breakdown in ventilation. When a colony is growing and robust, a change in weather for the worse can force the bees to stay inside, increasing congestion and prompting swarming.
The most common factor in swarming is congestion within the brood area.
Older Queens
A colony with a queen that is more than a year old is more likely to swarm than colonies with younger queens. Requeening on a regular schedule—at least every 2 years—is important for swarm management.
\
Other Factors in Swarming
In addition to congestion in the brood area and the presence of an older queen, other conditions that contribute to swarming behavior include:
· Poor production and/or distribution of chemicals (queen substance) secreted by queen
· Good weather preceded by a period of bad weather
· Disturbance by animals or beekeepers
· Poor ventilation/overheating
· Fumes from newly painted or treated hives
· A failing queen
· Genetic makeup
· Imbalance in the age structure or genetic makeup of the bees
· Idle nurse bees
· Pest infestation
· Lack of food
Preparing to Swarm
As discussed, a variety of factors contribute to the bees' inclination to swarm. When beekeepers fail to take steps to prevent such factors, or matters are out of their control, a colony will swarm.
In preparation for swarming, the workers encourage the queen to lay eggs in queen cups, rear more drones, cluster near the entrance (not due to discomfort), and reduce foraging activity.
Queen Cups and Queen Cells
Strong healthy colonies typically make 10-40 "queen cups." These are light yellow and hang vertically from the lower edges of the brood combs. Queen cups become queen cells when the queen lays eggs in them. If found during swarming season, they may also be called swarm cells.
A colony makes queen cups in preparation for swarming. Queen cups become known as queen cells after the queen lays eggs in them.
Preparing the Queen for Swarming
In preparation of the swarm, several things occur:
· Reduced feeding of royal jelly
· As a result of reduced feeding, less egg-laying and shrunken abdomen
· Body weight reduction, by at least 50%
The old queen, some drones, and 50%–60% of the workers are in the primary swarm. Before their flight, workers devour honey and store it in their honey stomachs, in order to:
· Prepare for a period of no food.
· Stimulate their wax glands to build a new honeycomb.
· Regurgitate any remaining honey in the new comb and feed the budding colony.
Swarm Initiation
Usually, swarms fly out of their hives on calm, sunny days from 10:00 a.m. to 2:00 p.m. and settle on a nearby tree, shrub, post, or building. They may stay in this initial location anywhere from several minutes to several days, until scout bees find them a new cavity to settle in. Sometimes, smaller after-swarms will follow with the newly emerged virgin queen(s).
If, for any reason, the old queen cannot accompany the swarm, it will return to its old hive.
A swarm typically flies out of the hive on a calm, sunny day. Scout bees search for a new hive location.
Minimizing Swarms
Swarm control is important for honey production because colonies that swarm rarely recover in time to produce a significant honey crop. Controlling and minimizing swarms is necessary in order to enjoy a successful crop of honey.
Colonies that swarm rarely recover in time to produce a significant honey crop.
Follow these initial steps to prevent swarming:
· Reverse hive bodies in early spring to create more space for brood and nectar.
· Be sure colonies have plenty of room to accommodate the expanding brood nest and to store incoming nectar in the spring (oversuper in spring).
· Check the colony mid-April to mid-June for queen cells.
· Destroy all swarm cells, but make sure that none of them are emergency or supersedure queen cells.
· Take further measures, such as splitting the colony, as discussed previously.
There is no way to absolutely guarantee that your hives won't swarm, but you can reduce the likelihood substantially by staying on top of hive maintenance. First, make sure there is enough room for brood rearing and nectar storage. Always stay ahead of the bees' needs, especially in the spring. Check each hive every week to week-and-half during the swarming season for queen cells. Typically, swarm and supersedure cells are found at the edges of the brood nest, especially hanging off the bottoms of the frames. If the colony is crowded, these are likely swarm cells. You can simply destroy these queen cells, but the bees have decided for themselves that a new queen is needed, so many queen cells will inevitably continue to show up until you, or they, resolve the issue. If the colony wants to swarm, you can initiate a split using one of the split techniques we discussed. If the colony is superseding its queen, you can let it, or destroy the old queen and introduce a new one. Once you develop an effective system, based on the conditions inside the hive, you should be able to minimize swarming.
Swarm Cells vs. Emergency Cells
Queen cells found hanging vertically from the lower edge of the comb during swarming season are called "swarm cells," and they are meant to produce queens in addition to the old one.
On the other hand, when a queen is absent due to natural causes, an accident, diseases, or predators, bees create "emergency cells" by turning worker cells into queen cells. Emergency cells are few and are found on the face of the comb. Emergency queen cells may also be built in response to a failing queen as the colony is preparing for supersedure. A failing queen will usually attempt to initiate a swarm before the emergency queen pupae reach maturity.
Swarm cells hanging from the bottom of brood frames.
Equalizing
One way to prevent swarms as well as make weaker colonies more productive is to "equalize" the strength of colonies, i.e., strengthen the weaker ones and reduce the strength of the stronger ones.
One of the easiest ways to equalize is to interchange the locations of the strong and weak colonies within the same yard. Foraging bees from the strong hive will return to their old location but instead enter the weak colony, strengthening it. Simultaneously, the strong colony will have a decreased population, and idle bees that might have prepared to swarm will forage instead.
One of the easiest ways to equalize colonies and prevent swarming is to interchange the locations of the strong and weak colonies within the same yard.
There are several other ways to equalize weak colonies:
· Add sealed (capped) brood from strong, healthy colonies.
· Add queenless booster packages.
· Combine two weak colonies, separated using the newspaper method.
· Combine two colonies, only one of which has a queen.
Uniting Weak Colonies
What do you do with the "spare" queen when you unite two weak colonies?
If you have enough bees from another colony, you can create a "nuc" with it and introduce the queen. This will tell you if the quality of the queen was a factor in the weakness of the old colony.
Note:
· The newspaper method helps the odors of the combined colonies mingle over time, successfully uniting them.
· If combining in fall, be sure to leave the colonies with sufficient honey for the new colony size.
Preparing to combine colonies using a piece of newspaper to separate them until they become more comfortable with each other
5.1 Overview
This is module five, Late Spring and Summer Management. In this section, we'll talk about organizing your hive to maximize honey production and harvesting efficiency. If things are going well in your hive, this is the time of year when honey production kicks into gear. Assuming you're planning on harvesting honey later, it's in your best interest to help the bees along with some strategically placed honey supers. If the bees are healthy, you have enough nectar sources nearby, and you provide an encouraging environment, you can look forward to some delicious, homegrown honey in a few months.
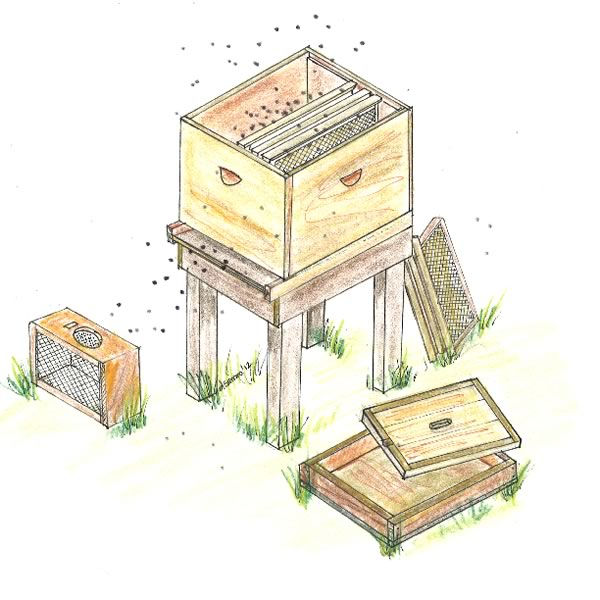
5.2 Supering
What is supering? A "super" is a box for honey storage, and to super is to place this box on the hive. Supering is typically done during spring and possibly fall. Supering is necessary not only for honey storage, but also to hold the incoming nectar in spring and fall. 50%–80% of nectar is water, and until it is evaporated, it takes up a lot of comb space. In contrast, ripe honey has less than 18% moisture. Not adding enough supers can put constraints on brood rearing and honey storage. It also can contribute to congestion in the hive, leading to swarming. Let's talk about honey supers. First off, why are they called supers? Well, like a lot of English words, this one comes from Latin, in which super means "over," "above," or "on top of." Think of superscript, which is the text that appears "above" other text, or a school superintendent, who is "above" everyone else in the hierarchy. A honey super is a hive body that goes "above" the brood chamber. The brood chamber is almost always at the bottom of the colony. In nature, bees generally try to set up shop in hollow logs or tree cavities. In these natural hives, the brood is typically at the bottom and honey is stored above. We use that natural tendency of bees to our advantage. The Langstroth hive is designed to provide a separate place, the supers, for the honey to be stored that allows it to be easily removed without putting undue stress on the colony. As you move through this course, you'll see references to top supering and bottom supering, under supering and over supering, all of which are words that only beekeepers use. Top supering and bottom supering are close to what they sound like. If you put a super on top of all existing full supers, it's called top supering. If you put it underneath all the other full supers, but still above the brood chamber, it's called bottom supering. Over supering and under supering however, do not have to do with being over or under anything. Instead, over supering means having extra supers, more than are needed, typically done in spring. Under supering is achieved by removing supers so that the bees consolidate their honey stores, and is typically done in the fall.
Types of Supers: Overview
Supers come in different sizes and are always added above the brood nest, because in a natural hive the brood is on the bottom and honey is stored above.
There are four terms that beekeepers use concerning supering:
· Top supering—placing a super on top of the hive
· Bottom supering—placing a super at the bottom of the supers (still above the brood nest)
· Undersupering—using fewer supers
· Oversupering—using more supers
Quantity and Size of Supers
The number of supers needed depends on the strength of the colony and nectar flow, both of which can vary from year to year. However, the rule of thumb is oversuper in spring and undersuper in fall. Nectar flows are usually stronger in spring, requiring more storage space. More supers and empty combs encourage foraging and honey production in the spring and also reduce swarming. On the other hand, few supers make the colony consolidate its stores in the fall and prepare for winter.
The rule of thumb is oversuper in spring, undersuper in fall.
Any hive body can be used as a super. Sizes vary from shallow or section comb supers to deep supers. Supers will eventually need to be moved, so the physical strength of the person moving the hives should be considered in addition to the expected quantity of surplus.
Hints on Supering
· Try to prevent the queen from laying eggs in the honey supers; brood is difficult to deal with when extracting honey. Queen excluders can help, but a full honey super directly above the brood nest can also prevent the queen from moving into the supers above because she won't want to split the brood nest.
· Before adding supers, ensure that the colony is strong and that there is a nectar flow or a pending nectar flow; otherwise, the hive may suffer a wax moth invasion.
· It's time to add another super when the previous one is 1/2–2/3 full.
· Add a super when you see freshly secreted white wax, or "whiting," along the lower edge of the top bar.
Top Supering
In top supering, the most common method of supering, a super is placed on top of the previous one. Top supering is the most common way to manage a hive. While the brood chamber is typically on the bottom after coming out of winter, the bees will have moved up into the top boxes where their winter food was stored, and the queen will have laid eggs here. Your brood nest is now at the top of the hive with empty boxes below. At this time, it is a good idea to reverse the boxes, placing all boxes with brood in them at the bottom of the stack and any empty boxes above the brood. This will give the queen plenty of room to lay eggs and fill out her brood nest. You will also want to add two supers above the brood nest boxes for the bees to store nectar and make honey. They need a lot of space in spring so it is okay to oversuper. Once those existing supers are half to two-thirds full of nectar you can simply put another super on top. That's why it's called top supering. If you happen to have frames with already-drawn combs, and you put those in the top super, the bees are pretty likely to start to use them. If you only have foundation available, you may need to entice the bees to come up into the new super with a frame of open nectar taken from the boxes below. The main advantage of top supering is that it's the easiest thing for a beekeeper to do. Take empty supers and set 'em on top of the hive. If your bees fill the top supers up with honey, that's great. Later in the year, you can pull off all of the full supers and harvest your honey. The disadvantages include; the long climb bees have to make up the hive to deposit their nectar, and the increased foot traffic over the lower supers of those bees going up and down the hive with every load -- darkening the wax of the lower combs. There is the possibility that the bees may not even want to use a new top super unless there is nowhere else to go. If the bees don't make use of the upper supers and become crowded below, there is always somewhere else for bees to go....Away.
How It Works
Through the winter, bees move to the top of the hive, leaving empty boxes below. In the spring, reverse the hive by placing the brood at the bottom of the stack, leaving the queen with abundant room in which to lay eggs.
A super or two (if the colony is strong) can now be added to the hive bodies making up the brood nest. Once each super is 1/2–2/3 full, add another super. In the new super above the ones that are at least partially filled with honey, place drawn combs with honey or frames of open nectar, especially if the super contains only foundation. This will attract bees to the top.
Continue adding supers as bees fill them up with nectar, until you can harvest honey.
Advantage of Top Supering
· It's easier!
Top supering requires less work, since placing or removing the topmost box is easy and it only requires you to look into the top of the hive to check if more supers are needed.
Disadvantages of Top Supering
· Delays honey harvest - It takes bees a long time to move up, so honey harvesting may be delayed.
· Darkens honey cells - Bees' movement up and down the supers tends to darken newly capped honey cells.
· Can lead to crowding and possibly swarming - Methods of encouraging bees to move up may not work, crowding the brood nest below. This could cause the colony to swarm.
Bottom Supering
In bottom supering, supers are added under previous ones, but still on top of the brood nest. Although top supering is the more common method, some beekeepers prefer to add supers on the bottom, because partially filled supers at the very top attract bees above, into the empty super immediately above the brood nest. A bottom super (under a partially or completely full super) can be used to induce bees to work foundation and draw combs. However, this process may take longer than working with drawn combs, reducing the amount of honey produced and encouraging bees to swarm. Some beekeepers prefer to add supers directly above the brood nest, under the existing supers. This is called bottom supering. Advantages of doing it this way include; making it easier for the bees to get to the empty frames because they're closer to the entrance, and reduced foot traffic on the honeycomb. The reason some beekeepers care about foot traffic on their honeycomb is that they are trying to sell chunk or cut comb honey, it doesn't look very good when the cappings are darkened by the bees excessive trodding over them. As I said, bottom supering reduces that problem. There are really only two disadvantages of bottom supering. The first, and most prominent, is that it's more labor intensive for the beekeeper. If you do it this way, you'll have to pull off the top supers to be able to add a new super below them. Those supers can be pretty heavy. If you use deep boxes as supers and they're full, they can weigh as much as 70 pounds. Remember when I said those handles were important? So you have to move the top supers off, add your empty super, then reassemble the hive. All that work is just not worth it for some beekeepers. The second disadvantage is that if you put an empty super directly above the brood nest, and you don't use a queen excluder between those, the queen may move up into that super and start expanding her brood nest, which kind of defeats the purpose of having another honey super. A full super of honey can actually act as a queen excluder since the queen will not cross a wide expanse of honey to lay more eggs. If you are not going to use a queen excluder, it is a good idea to leave at least one full super between the brood nest and the new supers that are added. Figuring out which way you prefer to add supers is part of the fun and experimentation of beekeeping.
Advantage of Bottom Supering
· Reduces foot traffic across honeycombs - Top supering forces bees to travel much more between the brood nest and the open combs in a super. Foot traffic tends to leave stains on capped honey cells, darkening them and reducing the value of chunk or cut comb honey. Bottom supering avoids this consequence, producing cleaner honeycombs.
Disadvantages of Bottom Supering
· Physically demanding work for the beekeeper - Bottom supering tends to be more work for the beekeeper. Every time you add an empty super, remove a full one, or need to check the nectar flow, you will need to take off the ones on top, add one on the bottom, and restack the supers. Given that a full super can weigh up to 70 pounds, this can be a physically strenuous process.
· Queen and brood in the super - If the beekeeper does not insert a queen excluder above the brood nest, the queen may lay eggs in the bottom super and expand her brood there. This will make it difficult to gauge the nectar flow and may make it difficult to harvest the honey because of its commingling with brood.
An easy way to avoid this is to add a queen excluder or a full super right above the brood nest; the queen will not cross these barriers to lay eggs in the empty supers above.
· Partially filled supers - During a light nectar-flow season, bees may not work in the upper supers, filling them only partially by the end of the season.
6.1 Overview
Welcome to Module 6, Fall and Winter Management. In this section, we're going to discuss things you should do to prepare your hives for the winter. There are a lot of different things you may choose to do at this time of the year depending on the condition of your colonies. Some of these things are optional, like combining weak colonies or requeening, while other things are required, like making sure your colonies have enough food for the winter. Let's get started.
6.2 Requeening
One of the most important factors to the success of beekeeping is a young, healthy, vigorous queen.
A productive queen is essential for a healthy colony. Queen bees can live for years, but they usually become less productive after one or two years. For this reason, many beekeepers requeen annually. Colonies can re-queen themselves and some beekeepers prefer to let the bees complete the process on their own. However many beekeepers want to re-queen with queens selected for mite resistance or increased productivity. A new queen can be introduced at any time but we recommend requeening in the early fall since it's advantageous for colonies to go into the winter with young vigorous queens and such queens reduce the likelihood of swarming the following spring. Also northern-bred queens are only available in the summer and fall. A new queen in the fall should promote a bigger brood earlier in the spring, which makes for a stronger colony and better honey production too. Now, in order to requeen a hive, you have to do something that some people find shocking. You have to kill the current queen. It's good not become too emotionally attached. Once you've removed the old queen, you can introduce the new queen in the same way we demonstrated in the installation of package bees in Module 3, by inserting the new queen cage between two frames in the hive body. If everything goes according to plan, your colony will accept the new queen in a few days and she'll be on her way to laying eggs in no time. Requeening is highly recommended if you want to keep your colonies healthy and productive.
When to Requeen
A queen typically reproduces maximally for the first 2 years, so it is important to replace the queen regularly or when signs of failure are apparent. Many beekeepers replace the queen every year to avoid the possibility of failure, while others prefer to let colonies replace their own queens through supersedure.
It is important to replace the queen regularly, or when signs of failure are apparent.
A queen looking for an appropriate place to lay an egg
Conditions for Requeening
These are ideal conditions for requeening:
1. Only after destroying the old queen.
The new queen can then be introduced immediately using a queen shipping cage with candy plug or a push-in hardware cloth cage. Alternatively, you can wait for 5–6 days, at which time all worker brood will be too old for the bees to make a new queen. The bees will have started emergency queen cells; great care must be taken to remove these cells, or the new queen will not be accepted.
2. When there is a strong nectar flow.
A good time is during the goldenrod flow, which masks the odor of the new queen and makes her acceptance easier. If this timing is not possible, feed sugar syrup to the colony during requeening efforts.
Requeening in Late Summer/Early Fall
It is easier to requeen in the spring, because the colony is small and therefore the old queen is easier to find. However, the advantages of requeening in late summer/early fall can outweigh this convenience since:
· Locally reared queens, now popular among beekeepers, may be available only in summer and fall.
· Young, healthy queens will lay eggs late into the fall, strengthening the population of young bees that might survive the winter.
· Requeening in the fall encourages spring buildup, decreases the bees' urge to swarm, and may increase honey production.
· Young queens start expanding the brood earlier in the spring and are less likely to be superseded the following year.
How to Requeen
A queen (painted with a blue dot) in a queen cage resting on top of a brood chamber
1. Find the old queen.
· Find the old queen by looking through the colony frame by frame, focusing on areas where eggs are located. Use as little smoke as possible to keep the bees from running.
· Alternatively, if the brood nest is made up of several boxes, you can place queen excluders between each brood box. Return after 3 days and check the location of eggs. The queen will be in the box with eggs.
· Ultimately, you have to be able to distinguish the queen from the other bees by her appearance. Even if you have marked her or bought her already marked, it is not uncommon to be looking for a queen that is unmarked because of a missed swarm or unexpected supersedure.
2. Destroy the old queen.
§ Pinch her.
§ Then release her pheromones by crushing her head against the cage of the replacement queen. This assists in the colony's acceptance of the new queen.
3. Introduce the new queen.
· Insert a mailing cage between two frames or insert a push-in cage onto a brood comb.
If using a mailing cage, remove the cork from the candy end and insert the cage between the frames so that the bees have access to the screen side of the cage and the candy plug is facing up. Check in a few days to be sure she is released and eggs are present.
If using a push-in cage, you will have to physically release the queen after 3–4 days.
· Create a nucleus colony, feed it light syrup, and then introduce the queen. Use the newspaper method to combine the nuc with the larger colony.
6.3 Food Stores
During the fall and winter, colonies need sufficient space to form a cluster and store honey. Two to three hive bodies or supers with at least 60–80 pounds of honey by late fall is recommended.
If you live in the northern climes like us, you'll have to make sure your hives have enough food to make it through the winter. Honey is always the best food for bees, but if it doesn't look like they're going to have enough due to a shortage of nectar in the fall, you can feed them sugar syrup to help them build their stores. During the winter, bees cluster together to conserve heat, and the cluster needs to be near the honey to access it. If they have to move very far to get food, they will likely freeze to death so having enough honey in the hive in the right place is really important. A healthy colony will need around 60- pounds of honey to make it through an average winter. The honey should be located above the brood nest where the bees will be clustered at the start of the winter. Throughout the season, they will move up, eating the honey as they go. If you find that in late winter they've made it to the top of the hive and have consumed all of their honey stores and there aren't any flowers blooming yet, you are going to have to feed them. I talked briefly in Module 4 about different times when supplemental feeding is warranted, and this is one of those times. You want to prevent starvation of the colony, so you have to give them something to eat if they're out of honey. When the bees are clustered, you have to feed them something with very little moisture content, such as sugar candy or, as a last resort, granulated sugar. Too much water in their diets puts a lot of stress on the bees' digestive systems, because they can't take cleansing flights, and it increases humidity inside the hive. We don't want to do either of these things. For these reasons, we do NOT use sugar syrup that we previously talked about using in the spring and sometimes in the fall. We've included recipes and feeding procedures for each of these things elsewhere on this page. Explore it thoroughly and you'll be well prepared to keep your colony fed until the first spring flowers start to bloom.
Winter Food
The quality of winter food is crucial, and the best food source for bees is honey.
Alternatives to Honey
If honey is unavailable or insufficient, one of two alternatives can be employed, depending on the season:
· In the fall, if the colony has inadequate food stores, you may feed it sugar syrup.
· If by midwinter the bees have exhausted their honey stores, feed them dry sugar or candy—something with very little moisture. This is important in order to avoid stressing the bees' digestive systems because they will not be able to take cleansing flights during very cold weather. Excess moisture will increase the hive's humidity, affecting the health of the colony and combs.
Locate Food Above the Brood Nest
When the temperature outside dips below 57°F, bees form a relatively active cluster to generate heat. At this point, the location of the food source becomes very important. Honey for winter feed must be above the brood nest because the cluster moves upward as it consumes the stores through winter. This tendency to move upward is so strong that the cluster will not move to a food store placed below, even if the colony is facing starvation.
Honey for winter feed must be above the brood nest because the cluster moves upward as it consumes the stores through the winter.
Important Note!
Remember to remove the queen excluder before winter! As the rest of the colony moves upward during the season, she would then be isolated below the excluder and freeze to death.
If during the change of season from winter to spring you find the bees not moving upward despite having honey left over, tap the side of the hive to generate activity.
Feeding Recipes and Procedures
Refer back to Section 3.6: How to Feed Bees for complete details, recipes, and feeding procedures.
6.4 Hive Check
An important part of fall management is preparing the hive for winter by doing a hive check. Going into winter, honey stores should be adequate and positioned above the brood nest. Hives should be well ventilated yet protected from winter winds and mice.
Now that you've taken care of the inside of the hive, it's time to make sure the outside of the hive is ready for winter. On this page, we'll show you how to provide adequate ventilation for your hives while preserving valuable heat and we'll take a look at how to protect your hives from mice. Mice can be a surprisingly big problem in a beehive during winter. They don't disturb the bees, but they sure can destroy the combs so we'll show you a few passive options for keeping them out. We'll discuss reducing the bottom entrance of the hive and why you might want to provide top entrances, which allow better humidity regulation and provide an alternative escape route should the bottom entrance become clogged. Finally, we'll go over some options for insulating and waterproofing your hives for the winter, which becomes more important the further north you are.
Inside the Hive
Before preparing the outside of the hive, you should do a couple of things inside the hive, if you haven't already:
· Remove surplus honey, partially filled honey supers, or empty supers when the honey flow ends or after a killing frost.
· Remove any queen excluders before winter so that the queen can move upward with the rest of the cluster as the months progress.
· Remove all extra equipment.
Ventilation, Insulation, & Mouse Protection
Provide Top and Bottom Entrances
One way to help increase a colony's chances of winter survival is to provide both a top and bottom entrance. The two main reasons for a top entrance are to:
· Provide additional ventilation to remove excess moisture from the hive
· Create an alternative exit for bees should the entrance become blocked with dead bees or snow
Insulation and Heat Preservation
The degree of insulation needed for your colonies depends on the kind of winter their location typically experiences. For instance, Mid-Atlantic colonies are insulated with just a reduced entrance, while northern colonies may be insulated by wrapping hives with tar paper and placing straw or other insulating material under the cover.
Using entrance cleats to restrict the entrance can reduce wind entry and preserve heat in the colony, but it can also get clogged more easily with dead bees.
Protection from Mice
Mice are attracted to the warmth in hives and sometimes make them their homes, although they usually do not disturb the bee clusters. Even so, they are a significant pest to hives, because they chew large holes in adjacent combs to make space for their nests. An effective way to keep them out is to place hardware cloth or a cleat in the main hive entrance in early fall.
Bend a piece of 3-mesh-to-the-inch hardware cloth into an appropriate shape to fit snugly into your hive, then secure it into the entrance.


Comments