Bee Keeping 101: Hives, Clothes, Tools, Bee Types, Caring for bees
- Penn State Extension & JS

- Apr 7, 2020
- 35 min read
Updated: Apr 10, 2020
The Langstroth Hive


1. Outer Telescoping Cover
An outer telescoping cover protects hive parts from the weather. It fits over the inner cover and the top edge of the uppermost hive body. The top is normally covered with a sheet of metal to prevent weathering and leaking.
Removal of the outer cover, with the inner cover in place, disturbs few bees within the hive and allows the beekeeper to more easily smoke the bees prior to colony manipulation. Beekeepers who routinely move hives use a simple cover, often referred to as a migratory lid. Covers of this type fit flush with the sides of the hive body and may or may not extend over the front and back. In addition to being lightweight and easy to remove, these covers allow colonies to fit tightly against each other when hives are being transported.

2. Inner Cover
The inner cover rests on top of the uppermost super and beneath the outer telescoping cover. It prevents the bees from gluing down the outer cover to the super with propolis and wax. It also provides an air space just under the outer cover for insulation. During summer, the inner cover protects the interior of the hive from the direct rays of the sun.
During winter, it prevents moisture-laden air from directly contacting cold surfaces.
The center hole in the inner cover may be fitted with a Porter bee escape to aid in removing bees from full supers of honey.

3. Section Comb Super
Section comb honey supers are designed to encourage bees to build small combs so that the honey produced can be sold as section comb honey (honey still contained in the original combs). These boxes are 4 5⁄8 inches high and hold either basswood section boxes or plastic rings and section holders that come apart when harvesting the comb. Section comb honey production is a specialized art requiring intense management; it is not usually recommended for beginners.

4. Shallow-Depth Super
The shallow-depth super, 5 1⁄16 inches high, is the lightest unit to manipulate (about 35 pounds when filled with honey). These smaller supers are popular with people who don't want to handle heavy supers at harvest time. Using this size of super adds can complicate matters if numerous supers are needed to allow for the bees' honey production, but each super is easier to handle once fully loaded. This size has the greatest cost of assembly per square inch of usable comb space.

5. Medium-Depth Super
The medium-depth super, sometimes called the Dadant or Illinois super, is 6 5 ⁄8 inches high. This is the most common size of super used by backyard beekeepers. This size box can also be used to house the brood nest. Typically three boxes are needed to accommodate the brood nest and honey stores for winter. While this is the most convenient size for honey supers, it cannot be made efficiently from standard-sized lumber. (Note: I personally make my entire hive from Medium- Depth Super boxes. I find these to be the most weight I can handle on a regular basis and the easiest to use as supers and as brood boxes)

6. Queen Excluder
The primary functions of the queen excluder are to confine the queen and her brood and to store pollen in the brood nest. It is an optional piece of equipment and is used by fewer than half of beekeepers. Queen excluders are sometimes referred to as "honey excluders" because at times workers are reluctant to pass through the narrow openings of the excluder to store nectar in the supers above—especially if the combs are dry (contain no nectar or honey) and/or the super holds only foundation. This leads to congestion in the brood nest and encourages swarming. To minimize this problem, allow the bees to begin storing nectar in the supers before installing the excluder. Nectar stored in drawn comb will entice the bees to pass through the excluder. Never put supers containing only foundation above a queen excluder. An excluder is constructed of a thin sheet of perforated metal or plastic with openings large enough for workers to pass through. Other designs consist of welded round-wire grills supported by wooden or metal frames.

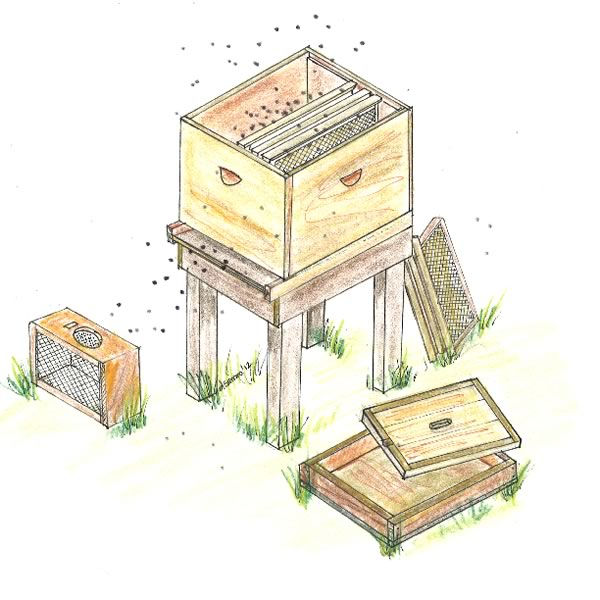
7. Full-Depth Hive Body
The full-depth hive body is 9 5⁄8 inches high. In our hive, we are using a full-depth hive body as our brood chamber, and this is the most common size used by beekeepers for brood rearing. These large units provide adequate space with minimum interruption for large solid brood areas; most beekeepers use two deep hive bodies to house the brood nest. The full-depth hive body is also suitable for a honey super. However, when filled with honey, it weighs over 60 pounds, making it difficult for some people to handle. These are called hive bodies. They are the boxes that hold whatever we put inside them. If we plan for the bees to grow babies in them, we call them brood chambers. Those are normally on the bottom. If we want the bees to use them for honey storage, which is usually above the brood chamber, we call them supers. Hives can have any number of hive bodies, but keep in mind that it gets a bit unwieldy and even unstable if they go too high. This is something each beekeeper can experiment with and try to arrive at the best number for his or her own circumstances.
During certain times of the year, you really only need two. You see these handles here, they're important because you have to move the bodies around occasionally to check for mites, pull frames out to see what's going on and get the honey out, and sometimes rearrange the hives. If the stack is too tall, it can be kind of a pain to do that. Now regardless of how many hive bodies you have, you want to make sure they have good handles on the sides that work for you.

8. Bottom Board
The bottom board serves as the floor of the colony and as a takeoff and landing platform for foraging bees. Since it is open in the front, the hive should be tilted forward slightly to prevent rainwater from running into the hive. Bottom boards available from many bee supply dealers are reversible, providing either a 7⁄8" or 3⁄8" opening in front. Warning!
When we set up hives and slope them slightly forward so that the rain runs out and not in the hive, the tilt should be hardly noticeable. Hives that are tilted severely can be a big problem: as they gain weight and/or as the ground softens with rain/snow, they can easily topple over.
The bottom board of a hive is a simple but important part of the system. In addition to recognizing its value, there are a few things you should know about it. First, this is where the bees will take off and land and it's good to have a nice place for this to happen. Another key is that you want to make sure the board is tilted forward so that any rain or snow that lands on it will flow out of the hive instead of into it. This is why you will notice a lot of hives that look a little bit like the leaning tower of Pisa or something. It isn't that beekeepers are careless, or that the hives are sinking in mud, just that having a slight tilt is the easiest way to keep rain water from rolling back into the hive. This slight tilting keeps the inside of the hive dry, which prevents all sorts of moisture-related problems. The bottom board is also where the hive guardians hang out a lot of the time, watching for danger. We're trying to make the bees' jobs as easy as possible so they can spend more effort on pollination and collecting nectar instead of getting in and out of the hive.

9. Hive Stand
The hive stand is an optional piece of equipment that elevates the bottom board (floor) of the hive off the ground. In principle, this support reduces dampness in the hive, extends the life of the bottom board, and helps keep the front entrance free of grass and weeds. Hive stands may be concrete blocks, bricks, railroad ties, pallets, logs, or commercially produced. A hive stand may support a single colony, two colonies, or a row of several colonies.

Comb Foundations
Honey bees build comb in fairly predictable ways, and beekeepers take advantage of this tendency. In the wild, bees build combs in tree cavities, or sometimes under a building overhang or on a cliff face. Each comb is two sided, that is to say it has cells for brood or honey on both the front and back of an ostensibly flat center panel.
It takes a lot of energy and food to fuel the bees to create as much wax as is needed for a hive, so the building process usually happens in the spring when nectar and pollen flow is rich. Many beekeepers help the bees along with the comb-building by giving them a pre-made foundation that serves as a blueprint upon which to draw out their own full combs, but they can definitely do it on their own too.
Foundations
Beekeepers can provide a center panel for bees by using a foundation. Foundations are imprinted with hexagonal-patterned cell "floors," known as comb guides. Inserting a comb foundation into a frame.

Comb Guides
Comb guides, designed to stimulate comb production in an orderly fashion, are coated with a thin layer of wax to encourage bees to build on it. Comb guides are designed to limit drone cell production by embossing the frame with pre-started worker-sized cells.
Since colonies need to produce some drones, they usually build the larger drone cells around the edges of the frames where the comb guides stop.

Honey bees do an amazing job of producing precise, uniform cells for brood development and honey storage.
Wax vs. Plastic Foundations
Beekeepers can purchase foundations made entirely of wax, or made of plastic with a wax coating. People have different opinions concerning which type is best, and conditions will vary depending on where you live, so try a variety of techniques to see what works best for you. Keep in mind that what works best for another beekeeper may not work best for you!
Conditions will vary depending on where you live, so try a variety of techniques to see what works best for you.
Wax Foundations
An all-wax foundation is less stiff and requires wiring to support the foundation and prevent it from buckling under its own weight. The advantage of a wax foundation is that it can be cut, sectioned, eaten, or thrown into a strainer when it's time to harvest honey. However, if improperly wired, it can "blow out" when put into a mechanical extractor.
Plastic Foundations
The advantages of a plastic foundation are that it is sturdy and easy to install.
Top-bar Hives
The most basic legal way to keep bees in the United States is to use a top-bar hive.
It is actually against the law in most states to purposely keep honey bees in hives without movable frames.
In a top-bar hive, there are no foundations or frames, but only bars across the top of each hive body. This style of hive allows (and requires) bees to build their comb entirely on their own, at least the first time. Once they have combs built, they can reuse brood combs.
It is actually against the law in most states to purposely keep honey bees in hives without movable frames because they cannot be opened and examined for brood diseases, especially American foulbrood.

Two top-bar hives with a sugar water feeder in between.

Combs built inside a top-bar hive with no frames or comb guides.
Hive Frames & Bee Space
Hive frames are removable slats that hold comb.
These are the frames. They are removable slats that are put in the hive. The bees will build their combs on these in a fairly orderly and accessible way, while maintaining the all-important "bee space," which is the gap between the combs that bees require. I mentioned earlier that it is common practice to assist the bees in their comb-building by giving them a template -- otherwise known as a foundation, to help them to construct relatively straight beeswax combs. Otherwise, it can get a bit messy and difficult to move the frames. Bees naturally want enough space to mill around between the combs, but not too much or they will fill it in with propolis or comb. That was one of Langstroth's big realizations and what led to this style of beekeeping. These frames are carefully designed to allow all the activities of a beekeeper to be done efficiently, while allowing bees to thrive.
What Is Bee Space?
In the previous video, you may have heard the term bee space. What is bee space, and how is it used inside a hive?

Size of Bee Space
Bee space is the gap between hive parts that allows bees to move around and work in the hive. The measurement of the gap is generally considered to be 1/4" to 3/8"; spaces larger than this are not optimal.
The important thing to understand about bee space is that if gaps between hive parts are too small, bees will "glue" them together and even fill them with propolis. Conversely, if spaces are too big, bees will build comb until only bee space remains between combs and other surfaces. If a hive is expected to be opened, manipulated, and used again, it is very important to account for bee space in the design.
Understanding how much space bees need enables beekeepers to create frames for combs that are:
· easy to remove from a hive
· easy to harvest honey from
Customizing Bee Space
All commercially produced parts are constructed with bee space in mind, but a beekeeper can change things inside a hive, most commonly the number of frames in a hive body.
For instance, when bees are drawing foundation, 10 frames should always be present in a hive body. Once drawn, 9 frames in a 10-frame super can be used so that the comb, when fully drawn and filled with honey, will protrude farther past the edges of the wooden frame. This makes it easier to uncap the comb at harvest time. This is one of many ways beekeepers customize their own hives to meet their needs.
If gaps between hive parts are too small, bees will "glue" them together; if spaces are too big, bees will build comb until only bee space remains between combs and other surfaces.
Langstroth's Bee Space
Numerous beekeepers explored the concept of bee space in Europe and America in the early 1800s. But L.L. Langstroth's U.S. patent in 1852 gave specific dimensions for most of the spaces between parts in a hive, and his design is the basis for hives that are in broad use today.
Clothing & Tools
Clothing
Most beekeepers use several pieces of special protective clothing:
· Veil
· Beesuit
· Gloves
You may ask "Why are bee suits white?" That's a good question. The answer is because bees don't like dark colors. You can speculate about why this might be. Perhaps bees evolved this response over time because animals that pillage hives are more often dark colored. Bears, raccoons, skunks, honey badgers, they all tend to be partially black or brown, especially around their faces. Bees also seem to be attracted to hair, vibration, and carbon dioxide, so your face is definitely a target of interest if bees feel threatened. Wearing a bee suit can make opening a hive a less painful experience, and it's better for the bees if they stay calm since stinging can cause them to die, so you want try to keep them calm and happy. Keep in mind that a bee suit isn't entirely "sting-proof," but it does reduce the likelihood of getting stung. Chances are that if you are a beekeeper, you will probably get stung once in a while. It's never fun, but it's a fact of beekeeping life. Once you learn how to manage your colony and wear the right kind of clothing and use your smoker, you will find stinging an infrequent experience.
Veil
The veil is considered the most important piece of clothing a beekeeper can wear. It goes over the head and protects the beekeeper from stings to the face, head, and neck.
Stings on the hands and body can be tolerated (by most people), but stings to the face are especially unpleasant.
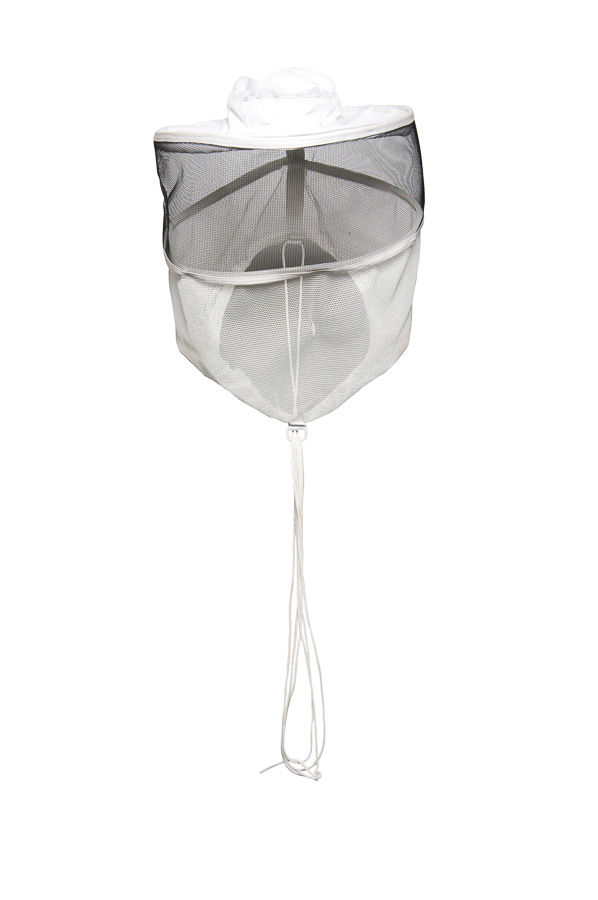
Veils come in a variety of designs. Some require a separate hat or helmet, while others are complete. Some bee shirts come with integrated veils.

Veils are light and breezy and easy to don, so we recommend wearing them any time a hive is disturbed.
Bee Suit
Bee suits are white coveralls made of sturdy fabric to protect the beekeeper's whole body from stings. They have elastic cuffs on the arms and legs to seal out bees.
Bee suits come in many styles, some with integrated veils.

Gloves
Beekeeping gloves are designed to reduce stings to the hands and lower arms. Regular work gloves can trap bees in the wrist area and lead to stings. Beekeeping gloves have extra-long gauntlets and/or sleeves that go to the elbow, and they have elastic at the cuffs to keep bees out.


Tools
You'll probably want to have these three tools for working with your bees:
· Hive tool
· Smoker
· Bee brush
Hive Tool
The hive tool is used for lots of prying, scraping, and leveraging tasks around and in a bee hive.
Scraping End
The scraping end of the hive tool is sharpened like a chisel to fit between frames in the hive and dislodge any that are stuck together with wax and propolis. It can be used to scrape off burr comb from the top and bottom of the frame, and to destroy swarm cells if needed.
Prying End
The prying end of the tool is good for lifting off covers and prying frames up high enough to get a hold of them with your fingers.


The prying end of the hive tool, in red, is used for lifting covers and prying frames. I personally prefer using two J hook hive tools when going into the hives... that way when the bees have put propolis on both sides of a frame you can pry on both sides at once. You break less frames that way.
Smoker
The smoker is a very important beekeeping tool. It is used to subdue the bees when opening a hive. When bees sense smoke, they attempt to engorge themselves on honey to prepare for an emergency flight, and the scent of smoke masks the bees' alarm pheromones. Judicious but careful use of a smoker is recommended. I personally do not use a smoker; I prefer making a 1:1 ratio of sugar syrup, putting it into a clean food-grade spray bottle and spritz the bees as i open the hive. By doing this they stay busy cleaning themselves.

Fire Pot
The fire pot is where the fuel goes in the smoker. A wire screen or grate near the bottom of the pot separates the fuel from the bottom surface of the smoker with a layer of air.

Bellows
The bellows are used to feed air to a fire. It's an old design that you don't see in many other places anymore, but it's still a great, durable, effective way of keeping the smoke coming without using batteries or fans.
Bee Brush
The bee brush can be used to gently brush bees off of frames when preparing to harvest honey or for any other reason a beekeeper might want to remove bees from a frame.

The bee brush is an optional tool. A leafy tree branch or a firm shake of the frame can achieve the same result.
In our experience, bee brushes seem to make bees angry, but feel free to experiment with one yourself.

A beekeeper uses a leafy tree branch to brush bees off of a frame. This is an alternative to using a bee brush.
Now that you have a basic understanding of bees and the equipment beekeepers use, it's time to set up some hives and put some bees in them. In this module, we'll talk about how to find an appropriate site for your apiary, and then cover a few different ways to acquire bees that you can put in your hives, like purchasing packages of bees or capturing a swarm. This is when you can finally say "I'm a beekeeper!"
What Kind of Bees Should I Get?
Honey bees in the United States are a heterogeneous blend of several strains introduced from Europe, the Middle East, and Africa. The three major strains are:
· Italians
· Caucasians
· Carniolans
In addition, many strains have been selected for specific characteristics such as productivity, gentleness, or mite and disease resistance.
In order to acquire a particular strain of bee, you only need to purchase a queen, since the queen controls the genetics of the colony.
An important factor to consider when purchasing queens is whether or not they are selected for mite and disease resistance. If you want to minimize the use of chemicals for parasite and disease control, you will want stock (or queens) that are mite and/or disease resistant.
In order to acquire a particular strain of bee, you only need to purchase a queen, since the queen controls the genetics of the colony.
Italian Bees
Italian bees are the most popular strain in the United States. They are light yellowish or brown with alternating stripes of brown and black on the abdomen. The lighter color of the Italian queen makes her easy to find in the hive.
Italian bees start brood rearing early in the spring and continue through late fall, which results in a large population and a considerable amount of nectar in a short period of time.
Drifting and robbing can aid in the spread of disease.
They do, however, require more honey for maintenance do other strains. They also exhibit weaker orientation, resulting in more frequent drifting from one colony to another; they also exhibit a strong inclination to robbing, which can aid in the spread of disease. Italians, though, are comparatively resistant to European foulbrood--the major reason they have replaced black bees.
Italian bees produce brilliant white cappings, which are ideal for producing comb honey.
Advantages
· Populate quickly
· Produce nectar quickly
· Resistant to European foulbrood
· Produce white cappings--good for comb honey
Disadvantages
· More honey needed for maintenance
· More frequent drifting and robbing

An Italian queen surrounded by her court.
Caucasian Bees
Caucasian bees are the gentlest of all honey bees. They are dark to black in color with gray bands on the abdomen.
They tend to construct burr comb and use large amounts of propolis to fasten combs and reduce the size of the entrance. Because they propolize excessively, they are not considered suitable for producing honey to be sold while still in the comb.
Caucasians are inclined to drifting and robbing, but not to excessive swarming.
Colonies normally do not reach full strength before midsummer, and they conserve their honey stores better than the Italians do. They also forage at somewhat lower temperatures and under less favorable climatic conditions than do Italian bees and are reported to show some resistance to European foulbrood.
Caucasians are available but not common.
Advantages
· Gentle
· Conserve honey stores well
· Good foragers
· Some resistance to European foulbrood
Disadvantages
· Propolize excessively so unsuitable for comb honey sales
· Inclined to drifting and robbing
Carniolan Bees
Carniolan bees are dark with brown bands on the abdomen.
They overwinter as small clusters but increase rapidly in the spring after the first pollen. Therefore, the major disadvantage to Carniolans is excessive swarming. Due to their small overwintering cluster size, they are very economical in their food consumption, even under unfavorable climatic conditions, and they overwinter well.
They are not inclined to robbing, have a good sense of orientation, and are quiet on the combs.
They are available but not common. Some of the stock is listed as New World Carniolan, considered by some beekeepers to be the better Carniolan strain.
Advantages
· Lower food consumption
· Overwinter well
· Good sense of orientation
· Not prone to drifting and robbing
Disadvantages
· Prone to swarming
Other Strains
Buckfast Bees
Buckfast bees are a hybrid from southwestern England and are readily available in the United States.
They are more resistant to tracheal mites than other bee strains and also better suited to cool climates.
Russian Bees
Russian bees have been exposed to Varroa mites in their native homeland over a long period of time and have developed a natural resistance to them. The USDA carefully selected and imported Russian queens into the United States. Russian colonies were created and evaluated in isolation before being released to commercial breeders to be propagated. Russian queens are now available to be purchased from Russian queen breeders.
Hygienic Bees
Hygienic bees, specifically Minnesota hygienic bees, have been selected for improved hygienic behavior. Good hygiene--specifically hive cleaning and the removal of dead or dying brood--rids colonies more quickly of potentially harmful pathogens, which cause disease. This strain of bees is considered disease resistant. Some level of resistance to varroa mites is also associated with this line of bees.
Good hygiene helps rid colonies of potentially harmful pathogens, which cause disease.
VSH (Varroa sensitive hygienic) is a line of hygienic bee that is particularly sensitive to varroa mites and their removal.
Where to Get Your Bees
There are three main sources from which people get their bees:
· package bees
· nucs and hives
· swarms
Package Bees
"Package bees" are produced primarily in southern states and California. You can obtain packages from:
· a local beekeeper
· a supply dealer
· directly from the producer; have them shipped by U.S. mail

A 3-pound package of bees arrives in its shipping crate.
Now that you've got your hive built and set up in a good spot, it's time to add some bees! How do you get bees? Well, let's start with the most common way. You ORDER them from a package bee supplier. People in your local beekeeping association can help you find a good supplier; or someone in your area might even buy packages in bulk for people like you. If you don't belong to a beekeeping association, you can look in a beekeeping magazine for advertisements for package bees...or do some research on the internet until you find a supplier who seems to have what you're looking for. Once you identify a supplier, order yourself up the number of packages you need to fill your hives. We recommend you order early, preferably before Christmas, since package bees sell out fast these days. They come in 2-pound, 3-pound, and 5-pound packages. Three-pound packages tend to be the most popular. You can order them with a mated queen if you're starting a new hive or without a queen if you're trying to strengthen an existing colony. The earlier you order your packages, the earlier you'll receive them. Ideally, you'll want to have them installed by Mid-April if you live in the north like us. The bees will arrive in a ventilated screen cage, looking something like this. There will be around ten thousand bees in here if you got the 3-pound package and a queen if you asked for one. There shouldn't be more than a handful of dead bees in the bottom of the package. If there are too many, contact your supplier immediately. Remember, bees are a perishable product. You should be ready to install them as soon as they arrive.
What Is a Package of Bees?
A bee package supplier starts with a large apiary. To make a package of bees, the producer takes frames of adult workers out of their hives and shakes them off the frames, through a funnel, and into the shipping package. To make the weight of the order, usually 3 lbs., the producer may put workers from different hives together in the same package.
A young mated queen unfamiliar to the worker bees is placed separately in a small queen cage, and that cage is placed inside the package with the workers so that they can become comfortable with her on their journey.

A queen cage with cork in the exit hole. The queen cage is attached to the shipping crate at the top, near the feeder. Two or three worker bees are commonly caged with the queen to care for her. Queen cages are supplied with an additional food source of sugar candy.
Finding a Reliable Supplier

You can find a supplier through your local beekeeping association, by researching online, or by looking in beekeeping trade magazines and catalogs.
Consider the following when choosing among vendors:
· How long have they been breeding and selling bees?
· Do they have a reputation for consistently providing healthy bees?
· Do they employ dependable shipping practices?
· Are they inspected each year by a state apiary inspector? Ask for a certificate of proof of inspection.
Removing the feeding can from an empty bee package shipping crate.
Package Bee Shipping
Package bees are perishable and should be handled with care. They are typically shipped in wooden cages measuring 6" × 10" × 16" , with wire screens on the long sides for ventilation. A can of 50% sugar syrup is included to provide food for the bees during transport. Packages are braced about a foot apart to protect them from crowding and overheating during shipment.
You should alert the post office about the expected date of arrival and should request immediate notification.
How to Install Package Bees
So you have your bees . . . now how do you get them into the hive?
Let's go ahead and assume that you ordered some bees and got them at the right time. Now you have to get them in the hive. Start by preparing a hive body with several frames on each side containing wax foundation, and a gap in the middle left by removing a few frames. Spray or sprinkle the bees in your delivery cage with a 1-to-1 sugar syrup solution made up of one part water to one part sugar. That makes it hard for them to fly, and gives them some food at the same time. Remove the feeder can and set it aside. Pull the queen cage out of the package. Remove the cork at the end of the cage with the candy in it, and poke a hole, carefully, in the candy.
Next, place the queen in her cage between two of the central frames, like this with the candy end up -- but far enough down in there that workers can get to the candy when the hive cover is put back on. Now comes the fun part. Turn your package, filled with thousands of bees, over and shake them into the gap between the frames. Bang one corner of the cage on the ground to jar the remaining bees into a pile inside the cage, then shake them into the hive too. You don't want to get TOO violent with the shaking, but you should be firm. You want to get 'em in there. Remember, the sugar syrup should prevent them from flying. Set the cage near the entrance of the hive, but not blocking it, so any stragglers can get out of the cage and make their way inside the hive; which they will want to do if the queen is in there. Now you can level out the pile of bees in the center of the hive with a hive tool, and gently place the missing frames back into the gap in the center, being careful not to squish any bees at the bottom. Now, you've got bees in your hive. You need to give them something to eat because there isn't much nectar available at that time of the year. It is critical that you feed your new colony as soon as it is installed. You can do this with at least one gallon of 1 to 1 sugar syrup. There are many ways to deliver the syrup, but it is critical that you continue to provide feed for your new colony until the days are warm and dandelions are in full bloom. At that point they will be able to feed themselves. Look in the feeding section on this page to get more details. Once you get the feed prepared, you can close up your hive and walk away. If all goes well, that's enough to get you going. Your hive is up and running!
Best Practices for Package Bee Installation
· Install package bees as soon as possible after your shipment arrives.
· Feed the bees as soon as you get them by spraying the sides of the cage with a 50% sugar solution.
· Continue to feed them every few hours until they are installed.
· Ideally, install package bees in late afternoon or early evening when the temperatures are cooler and there is less possibility of flight and drifting.
Nucs and Hives
Besides package bees, there are other options for purchasing bees for your new beekeeping endeavor:
· Buy a "nuc" with nuc box and bees
· Buy an established hive with a colony
Nucs
One option that offers a bit of a production advantage over package bees is called a "nuc." Nuc is beekeeper speak for a nucleus colony, which is a small honey bee colony created from a larger one. The nuc includes a nuc box with 3-4 frames of workers (tending to brood in various stages of development), a frame or two of honey, pollen, and a laying queen.
When placed in a full-sized hive at the right time of year, nucs can expand rapidly. The disadvantages of using nucs are that they are usually more expensive than package bees and that they pose a higher risk of disease transmission because brood combs are involved.
You will learn more about producing your own nucs in Section 4.3: Spring Splits.
Advantages
· Can expand rapidly
Disadvantages
· More expensive than packages
· Higher risk of disease
Used Hives
You can also consider buying an established colony and the hive in which it is living. This option might be great if someone has made a decision to stop keeping bees but still has some thriving colonies in good quality equipment, or has to move and doesn't want to deal with transporting hives.
It is difficult to determine the true market value and quality of used equipment and bees.

Because brood combs are involved, there is a greater potential for transmission of disease. One must always wonder why the seller is selling these hives. Some diseases like American foulbrood can be difficult to detect, especially if the seller has used antibiotics. Spores hidden in the equipment can not only destroy the colony that has just been bought, but they can quickly spread to other colonies you might have or to your neighbors colonies. For these reasons, buying established colonies is not recommended for beginner beekeepers.
Advantages
· Makes use of already existing colonies
Disadvantages
· High risk of disease transmission
Swarms
A hanging cluster of bees is called a "swarm." There can be as many as 25,000 bees in a swarm. If you have the opportunity to capture a swarm, it can be a cheap way to get a lot of bees to populate your hive or replace winter losses.
An interesting way to populate a hive or replace winter losses is to capture a swarm if the opportunity arises. There are no guarantees when it comes to capturing a swarm. But, if you find one early in the season that has clustered on a tree branch, or in a shrub, or under the eaves of a house, that's a great way to fill up a hive with bees for free! A primary swarm, that's the initial swarm that left a colony with the old queen, might have 25,000 bees in it, compared to a package that has only around 10,000 bees. It's a sweet deal if you can find and capture one. We'll talk about WHY bees swarm in module four, but for now let's show you how to capture and hive one. It might seem crazy to someone who hasn't ever kept bees to try to capture a huge cluster of 25,000 bees in a box, but it isn't as scary as it sounds. Bees hanging in a cluster are quite gentle. We don't recommend trying to capture a swarm that's too high or in a dangerous location. But if there's one you can reach from the ground, here's what you do. Find an empty cardboard box that has a tight-fitting lid and bring it to the swarm. Take off the lid and set it nearby. Hold the box under the cluster, or set it on the ground if the cluster is low, and, with a good snap, shake the bees off the limb and into the box and put the lid on it. Try to get as many of the bees as possible into the box. If the queen is in there, the remaining bees will want to get in as well. You can then take the box to your hive and treat it the same way you would if you were installing package bees. If you happen to have some frames of fully drawn comb available, put some of those in the hive as starter combs so the bees can get to work immediately.
What Is a Swarm?
Swarming is an instinctive part of the annual life cycle of a honey bee colony. It is thought that bees are more motivated to swarm when there is overcrowding and congestion in the nest, which typically happens in late spring and early summer.

A honey bee swarm clusters on a tree branch.
When a swarm leaves the nest, it does not fly far at first. Instead, it will alight nearby as a cluster. From there, 20-50 scout bees locate a new cavity, which may take a few hours or several days.
Hollow trees are the most common new nesting site, though they may settle in the cavity of a wall or under a porch. The swarm may fly a kilometer (0.6 mile) or more to its final nesting site.
Swarming creates a vulnerable time in the life of honey bees. A swarm will starve if it does not move quickly, or the queen may get lost or captured by predators during flight.
Where to Put Hives
When deciding where to put your "apiary"—your beehives—there are a few important matters to consider. Watch the following video for an introduction to placing your apiary.

Let's talk about finding a good site for your hives, your apiary. On this page, you can explore some of the important characteristics you should consider when deciding where to place them. The key elements are access to water, sun exposure, protection from the wind, especially in the winter, and access to adequate nectar and pollen. Take a look around the page.
Access to Water
The bees must have easy access to water—to drink, reconstitute crystallized honey, regulate hive temperature, and raise brood.
Like most living things, bees need water, but not just to drink. They also use it to reconstitute crystallized honey, and regulate the temperature of the hive. If you don't have a natural source nearby, you can provide water in some kind of pan or a tank. A birdbath works well. Bees can easily drown if they don't have some way to access the water without getting wet, so it's good to provide them with a floating board or a pile of gravel in the water. However you solve it, you have to make sure the bees have access to water at all times they are active.
Proximity to Pollen and Nectar
While a honey bee colony can be kept almost anywhere, if your goal is to produce significant quantities of honey, your colonies must be close to abundant pollen and nectar sources. Choose a location where flowering plants and blossoming trees are plentiful within a mile radius of your apiary.
Maximum Sun Exposure
The hive should also get maximum sunshine throughout the day.
Warm bees are happy bees!
Giving the hives maximum sun exposure is ideal. In the northern hemisphere, this means Eastern or Southern exposure so the entrance of the hive gets the early morning rays and is hit by sunlight for most of the day. Warm bees are happy bees. The sun also provides the benefit of keeping the hive drier, which can reduce the likelihood of some diseases, like chalkbrood. One more benefit is that if the sun is behind you when you're inspecting the hive, it's a lot easier to see down into the cells when you are looking for eggs and brood. A little shade in the heat of the afternoon won't hurt the bees and it's nice for the beekeeper on a hot summer day, but generally speaking, you want to make sure the hives are placed in a sunny location.
Protection from Wind
The hive should be protected from the wind.
Giving the hives maximum sun exposure is ideal. In the northern hemisphere, this means Eastern or Southern exposure so the entrance of the hive gets the early morning rays and is hit by sunlight for most of the day. Warm bees are happy bees. The sun also provides the benefit of keeping the hive drier, which can reduce the likelihood of some diseases, like chalkbrood. One more benefit is that if the sun is behind you when you're inspecting the hive, it's a lot easier to see down into the cells when you are looking for eggs and brood. A little shade in the heat of the afternoon won't hurt the bees and it's nice for the beekeeper on a hot summer day, but generally speaking, you want to make sure the hives are placed in a sunny location.
Easy Access to the Hives
Beekeeping equipment is cumbersome, and full honey supers are heavy. Being able to get close to your hives with a vehicle, garden tractor, wheelbarrow, or hand truck will make your life much easier.
One of the most important features of apiary placement is your ability to access your colonies. You'll need to be able to carry your equipment out to the hives, have enough room to work them when you get there, and be able to carry heavy honey supers away from them, so make sure you pick a site that works for the bees, and you.
Seclusion from Disturbance
Finally, hives should be secluded from foot traffic and from disturbance by animals and children. This is especially important if you plan to keep your bees in an urban or suburban area.
The next page discusses more about regulations you should consider before placing your hives, especially in urban and suburban locations.
Regulations Impacting Beekeepers
Before keeping bees or placing hives, prospective beekeepers should learn about their state and local regulations. Be sure to check the laws by contacting your local Extension office or agriculture section of your state government websites.
Before keeping bees or placing hives, prospective beekeepers should learn their state and local regulations.
State Regulations
Various states require all beekeepers to register their apiary locations, a policy in place mainly to allow inspections and prevent the spread of bee diseases and parasites. There may also be laws and regulations in your state that deal with the packaging and labeling of your honey for sale.
Local Regulations
Local beekeeping regulations (boroughs, towns, cities, etc.) mostly pertain to nuisance issues.
Regulation Resources
Use the Apiary Inspectors of America (see Resources) to look up the regulations for the state and municipality where you want to have your apiary. From there, you can find your state's Beekeeping Association website or go directly to Pennsylvania's Beekeeping Association website (see Resources).
Within your state's page, you can click on the county in which you live and you will find a website specifically for that county as well as contact information for your county Beekeeping Association representative.
Additional Factors: Urban and Suburban Settings
If you plan to keep bees in an urban or suburban setting, you should consider these additional factors:
· Select a hybrid strain that has been bred for gentleness.
· Provide a source of water nearby to keep bees out of neighboring yards, swimming pools, and bird baths.
· Keep hives away from playgrounds, clotheslines, and other houses.
· It is recommended that you build a fence along any bee travel corridors at least 6 feet high to reduce the chance of human encounters.
· Consider your neighbors when manipulating and examining hives. Work the bees on warm, sunny days. Use smoke efficiently, and employ good swarm-management techniques.

Working with the Bees
We'll talk about two things:
· using the smoker
· how to approach the hive
Using the Smoker
The smoker is essential for controlling bee behavior when opening and working the hive.
The next page will give you more instructions on approaching the hive, but first, here is an overview of how to light and use your smoker. A properly lit and well-packed smoker provides enough smoke to work several colonies.
1. Light a small amount of fuel in the fire pot.
2. Puff the bellows until a flame appears.
3. When a good fire is going in the fire pot, you can add more fuel.
4. If the smoke becomes too hot or the smoker sparks, add a handful of green grass or damp leaves.
5. Blow several puffs of smoke into the hive entrance. Wait a few seconds.
6. Crack the lid and then direct your puffs underneath the top cover.
7. Remove the lid and inner cover.
8. As you remove frames, continue to blow puffs of smoke to direct the bees downward.
Follow the same steps when reassembling and closing the hive. More smoke may be needed on cool, cloudy days, but too much may drive bees out of the hive. You will learn to gauge the proper amount of with practice.
Approaching the Hive
Follow these steps when you are getting ready to work with your bees:
1. Light the smoker and put on your veil.
2. Approach the hive from the rear and direct puffs of smoke into the entrance as you gently remove the outer telescoping cover.
3. Place the cover upside down on the ground.
4. Remove the inner cover and be prepared to pry apart the propolis seal with your hive tool.
5. Remove the first frame and look for the queen. If she’s there or on any frame you are inspecting, carefully set the frame against the hive, remove the next frame, and gently place the first frame containing the queen back in the hive.
6. Continue to remove each frame, examine it, and replace it in order.
7. When finished, smoke the bees downward while reassembling and closing the hive.

How to Feed Bees
There are certain times when you'll need to feed your bees:
· Immediately after you install a new hive
· In the fall, to prevent winter starvation
· In the spring, to encourage colony growth
As Tom mentioned, when you install a new colony, you need to feed them immediately. You also need to be prepared to do this if you've overwintered hives and they're low on honey stores in the spring. In both cases, you'll need to feed until there are plentiful spring flowers and temperatures are warm enough for bees to forage and take cleansing flights. So let's talk about this supplemental feeding idea for a minute. There are two main reasons for feeding bees.
One, which happens in the fall, is to help the bees create and store enough honey to make it through the winter. This is about preventing starvation. We'll talk about fall and winter feeding in Module 7. The second reason we feed is to simulate a nectar flow and encourage growth of the colony. This happens in the spring. It gets a little complicated depending on what's happening with the weather and nectar flows, so for a detailed explanation, check out the recipes and feeding protocols section on this page.
Bee Food
Food for bees can include sugar syrup, fondant or sugar candy, or honey for carbohydrates. Proteins in the form of pollen or pollen substitute are sometimes fed as well. However, colonies are more likely to need supplemental carbohydrate feeding than protein feeding.

Homemade sugar candy placed on top of a super in late winter to prevent starvation. Sugar candy is best when it's too cold for bees to take cleansing flights.
Bees can only benefit from sugar (whether fed dry or in the form of syrup or candy) when the colonies are strong, the temperature is warm enough for the bees to break cluster, and—if using sugar candy and dry sugar—there is sufficient moisture.
There is an old saying in beekeeping circles that if you ask ten beekeepers about feeding bees, you'll get twelve different opinions.
Feeding DOs and DON'Ts
Do
· In order to prevent starvation, continue supplemental feeding until the weather changes so that bees are able to forage and there are abundant natural sources of nectar.
· Step-up management of colonies to prevent swarming in early spring, because sugar syrup will stimulate brood rearing.
Don't
· Mix vegetable oil in pollen cakes, because the lipids, i.e. fats, in the oil may be harmful to bees.
· Buy honey from other sources to feed bees or feed honey from colonies that you suspect are diseased.
· Burn the sugar when making sugar candy. Carmelization can be harmful to bees.
· Feed the bees high-fructose corn syrup. High-fructose corn syrup produced for human consumption can contain compounds harmful to bees.
When to Feed Your Bees
Feed your bees when: Natural honey or pollen is unavailable and stores are inadequate.
· The colony is facing starvation.
· It is necessary to supply medication (chemotherapeutic agents).
· You want to stimulate brood production and colony growth.
Seasonal Considerations
Fall
Bees in Pennsylvania need about 70 pounds of honey to get through the winter. It is critical for the beekeeper to determine if those honey stores are in the hive already (at least 15 frames of honey). If not, then the beekeeper must start feeding a 2:1 ratio of sugar to syrup.
Why 2:1 and not 1:1? At this point, you don't want to overstimulate going into winter (which a 1:1 will do). In addition, a 2:1 (mixture/syrup) will contain less water. Bees need to be getting rid of most of the water and pack the "food" away. Time is running short so they must be given "food" that has less water than a 1:1 solution has.
Bees in Pennsylvania need about 70 pounds of honey to get through winter.
Late February–Early March
Starvation usually occurs at this time. The queen has been laying eggs now for several weeks and young bees are starting to come on. Therefore, not only is honey being consumed by the new bees, but the existing bees also are becoming more active (they need more energy so they burn through more honey). In addition, the 60-70 lbs. of honey stored to get through winter is now depleted. If you notice bees at the top of the hive, it is a good time to give them sugar candy.
March–April
At this time, beekeepers use a 1:1 sugar syrup to stimulate brood production in established colonies and stimulate any package bees to start drawing comb. This is also a good time to treat for nosema by mixing Fumidil-B into the solution.
What to Feed Your Bees
You have several options for what type of food to feed your bees:
· Honey
· Dry sugar
· Sugar syrup
· Sugar candy
· Pollen cakes
Honey
Bees' own honey is always better than artificial feed. Leaving it on the hive from the previous fall is best.
Dry Sugar
Feed in early spring if bees are facing starvation and it's still cold outside.
Sugar Syrup
Feed sugar syrup when the weather is warming up but nectar flow hasn't yet started or is weak.
Sugar Syrup Recipe
Makes approximately 1 gallon of sugar syrup.
Ingredients
· 8 pounds sugar (standard crystallized cane sugar)
· 1 gallon water
Instructions
Heat water to boiling; remove from heat. Add sugar and stir until completely dissolved. Pour into feeding or storage containers. Allow to cool before feeding to bees.
NOTE: It is advisable to measure by weight rather than volume, as water is a bit heavier than sugar, throwing off the ratio at larger volumes. If making a large batch of sugar syrup, use mass rather than volume in a 1:1 ratio.
Sugar Candy
Sugar candy is an emergency feeding approach implemented in early spring when temperatures are below 50°F.
Sugar Candy Recipe (from Beekeeping Basics) Makes a large batch.
Ingredients
· 15 pounds sugar
· 3 pounds glucose or white corn syrup
· 4 cups water
· 1/2 teaspoon cream of tartar
Instructions
Combine the ingredients; stir and heat until sugar dissolves. Heat without stirring to 238°F (115°C), or until medium ball on candy thermometer; then pour the syrup onto a cold platter and cool until warm to the touch, about 180°F (81°C). Beat the syrup until it turns white; then carefully pour it into molds or shallow dishes lined with wax paper, or on a board feeder. Once the candy hardens, invert it over the top bars near the cluster. Keep it warm by covering the candy and the space around it with cloth or newspaper.
Pollen Cakes
Pollen cakes or pollen substitute can be fed in early spring before the first natural pollen becomes available.

Bees feeding on a homemade pollen cake
Pollen Cake Recipe Makes one cake (lasts 7-10 days in a healthy hive):
Ingredients
· 2 ounces pollen
· 6 ounces soybean flour
· 5 1/2 ounces water
· 10 1/2 ounces sugar
Makes 32 cakes:
Ingredients
· 4 pounds pollen
· 12 pounds soybean flour
· 11 pounds water
· 21 pounds sugar
Instructions
Mix pollen, sugar, and hot water; then add soybean flour until the mixture has the consistency of peanut butter. Recipes contain about 1 part pollen to 3 parts soybean flour mixed with heavy syrup (2:1 sugar:water).
When pollen is not available, you may substitute Brewer's yeast (1 to 6 parts soybean flour), powdered skim milk (1 to 4 parts soybean flour), or additional soybean flour. Form a patty 1/2-inch to 3/4-inch thick and weighing 1/2 to 1 pound by pressing the doughlike mixture between two sheets of wax paper.
How to Deliver Food
After you make your food of choice, you can deliver it to the bees in a number of ways.
Sugar Syrup Bag
In the Package Bees Installation video, Maryann is using a plastic freezer bag full of sugar syrup.
To deliver food this way, partially fill the bag with syrup, make sure the zipper has a secure seal, lay the bag on top of the frames, and poke a few holes in the bag with a toothpick or sharp knife. Small holes prevent drowning of bees and excessive leaking of syrup.
This is an inexpensive, easy, and very effective way to feed bees. We prefer this method over the more expensive options because it:
· Keeps the food where the bees need it
· Prevents drowning
· Reduces robbing by bees from other colonies and by other creatures

Other Feeding Options
Other options that might work for you include:
· Boardman feeder, or front-entrance feeder
· Bucket feeder, an upside down bucket with small holes poked in the lid; sits on top of the frames

Bucket feeder surrounded by newspaper for insulation
· Hive top feeder—probably the best-looking option, though much more expensive than the plastic bag method
· Quail waterers
· Front-entrance feeder

Commercial front-entrance feeder partially removed to show detail
Bee a Good Neighbor!
Honey bees may be a fascinating project to you, but your neighbors may be a little less excited about the prospect of a beehive in the neighborhood. A backyard beekeeper can take several steps to alleviate potential problems.

1. Fences or Hedges Make Good Neighbors
· "Out of sight, out of mind"—Create a barrier around hives that makes it difficult to spot by neighbors and passersby.
· Alter flight patterns—Bees tend to fly several feet off the ground, in the same area that people occupy. A fence or hedge near the front of the hive forces the bees to fly above head level.

Apiary of a suburban homeowner
2. Happy Bees Are Good Bees
Make sure your apiary is set up correctly and placed in a location that is suitable for honey bees.
· Place hives in an area that gets sun (not an excessive amount of shade).
· Raise the bottom board of the hive off the ground so that weeds don't choke the entrance.
· Tilt the hive slightly forward for water drainage.
3. Mean Bees Are Bad Bees
While aggressive bees can be managed somewhat easily in rural settings, they should never be tolerated in urban settings. If you have mean bees, it is time to requeen and introduce more gentle genetics.
4. Create a Local "Watering Hole"
Honey bees need water for a variety of hive activities such as cooling the hive and diluting honey. If you don't provide readily accessible water, they will go to the next closest "watering hole," which could be a neighbor's birdbath or swimming pool.
5. Manage Swarming
While a swarm of bees is a great spectacle (and a chance for you to start another hive), it can cause great fear in the neighborhood. Practice swarm prevention by providing adequate room in the hive for brood rearing and honey storage.
6. Be a Fair Weather Friend
Bees tend to be more aggressive when hives are opened early in the morning, late in the day, during cold weather (below 65ᴼ F), in rain, or when the sky is overcast. Try to open your hive on warm, sunny days if possible.
7. Sweeten the Deal
Providing neighbors with a jar or two of honey from your backyard project is a great way to put people at ease. At the same time, explain some of your beekeeping activities to them to help them understand that you are a responsible beekeeper.


Comments